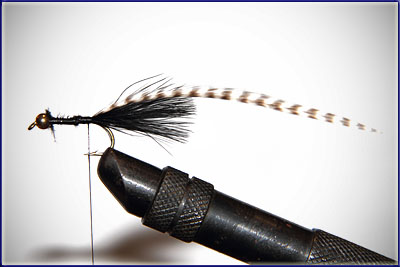
Wooly BuggerOriginator: Description: This is a fantastic still water fly, although it can be used in the deeper pools of rivers, and slow moving water. It has proven to be one of the favourite choices when one wants to use a nymph pattern. |
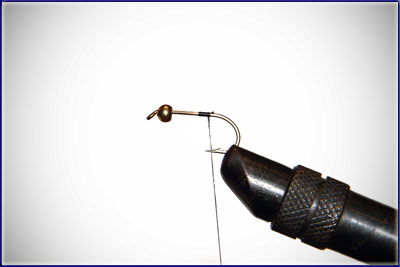 | Step 1:Start off by selecting a bead to suit the hook size and sliding it onto the hook. You may at this point need to de-barb the hook in order to get the bead on. Clamp the hook into the vice and secure your cotton at the bend of the hook. | |
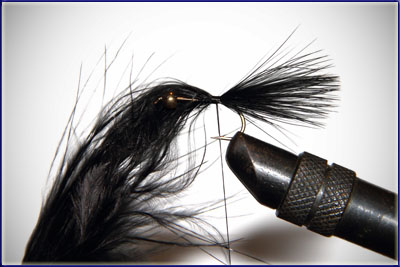 | Step 2:Tie on a piece of marabou using the pinch method to secure it on top of the hook. This creates the tail of the fly which should be roughly the same length as the shank of the hook. | |
 | Step 3:Rather than cut off the marabou in the previous step, tie it down the length of the hook back up to the bead. This will not only secure it more tightly but will also aid in bulking up the body. | |
 | Step 4:Trim off the remainder of the marabou feather. Remember that this fly has a lot of variations. For example I sometimes tie a little flash into the tail at this point. | |
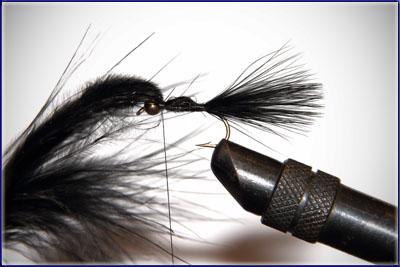
 | Step 5:Wind your cotton back to the bend of the hook, in the process tying in a hackle feather. Some people prefer to tie in the hackle feather at the front of the hook. The reason I tie it in at the back is so that the hackle points slightly forward once wound. I find that this gives the fly a better action in the water and traps in some small air bubbles which Trout seem to respond to. | |
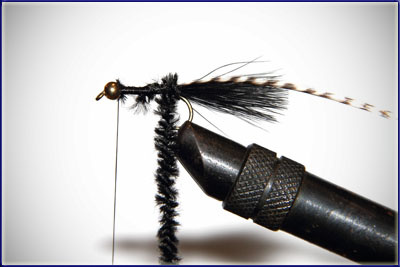 | Step 6:Now tie in your chosen colour chenille and wind your cotton back up to the bead. | |
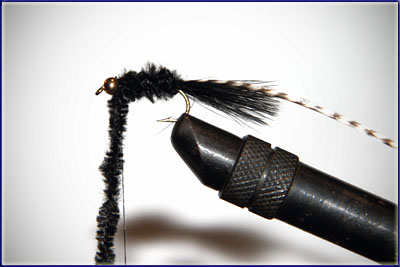 | Step 7:Wind the chenille back up the body. By winding it closer together, with slight overlaps, you can make a thicker body. Similarly you can wind it further apparent to form a thinner body. Again this is personal preference. | |
 | Step 8:Tie off the chenille and then cut off the remainder. | |
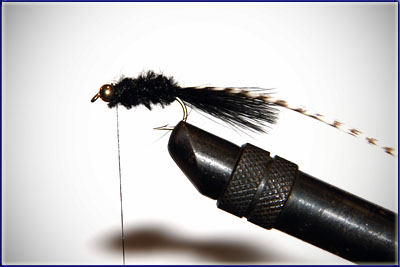
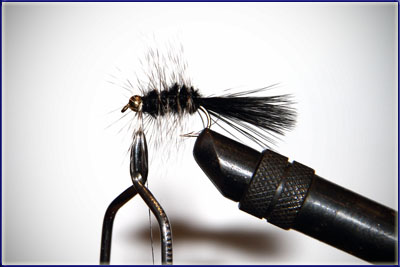 | Step 9:Using your hackle pliers wind the hackle feather up the body. Notice how the hackles point forward as I mentioned earlier. | |
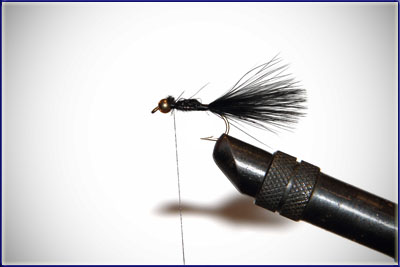
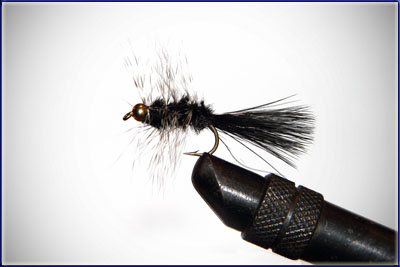 | Step 10:Tie off the hackle trying not to trap too many of them in the process. End off with a half hitch and a little glue if you want your fly to live a longer life. | |